
This post contains affiliate links. Read the full disclosure here.
Contents
Everyone has that one old kitchen utensils or gadgets they’ve always wanted to go back to at some point but what do you do then if you notice that what you intend to go back to has suddenly developed some rust?
Do you throw it away with the mindset of getting another or you simply look for a way to bring it back to life? Well, in this post, I’m going to hold your hands and walk you through the step by step instructions on how you can clean an old meat grinder and bring it back to life.
But before I dive straight to giving you all that you need to restore that grinder that has developed some rust, I would like us to go through what causes meat grinders to rust.
What Causes Meat Grinders To Rust In The First Place?
It is a well-known fact that meat grinders are made up of different materials. When the iron in these materials then come in contact with oxygen and water, it causes the metal to corrode. Why you may ask?
The reason is that oxygen and iron have different charge poles hence the attraction. When these poles then come together, they form what is known as oxidation. So it is the chemical reaction they produce during the coming together that actually gives rise to rusting.
One thing about rust you must know is that they change that which is very attractive to unattractive. Not just that, they also render the metal weak and then begins to crumble with time.
So once you find out that your meat grinder is becoming rusty, the next best thing is to act fast so as to put a stop to that rust. Continue reading to learn how you can prevent your meat grinder from rust.
How Do You Keep Meat Grinders From Rusting?
One of the most effective ways to prevent your meat grinder from rusting is to ensure that they’re well cleaned and maintained after each use as failure to do so will lead to bacteria build-up and invariably cause them to rust.
What if what you got is an old grinder and you’re trying to bring it back to life? Well, if you have an old grinder and you’re looking for the best way to clean them up and get them back to use again then you might want to see the below steps.
How To Clean An Old Meat Grinder – Step By Step
Before using an old meat grinder that has seen better days, it’s essential that you clean them up properly. Cleaning them will help make them safe again for grinding and prevent contamination of any kind. Below are some few steps to achieve that.
Step 1: Dismantle
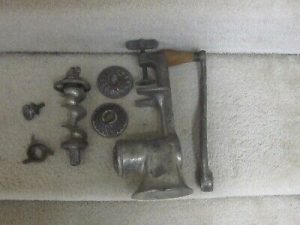
The first thing you might want to do is to disassemble the grinder then take out each part and put them carefully in a bowl.
Step 2: Soak
Now that you’ve successfully dismantled each of the parts, it’s now time for you to soak them in a solution containing warm soapy water and vinegar for 30 minutes.
Step 3: Wash
Once it’s 30 minutes already, take out one part at a time from the bowl, with a brush, gently brush and ensure to pay special attention to the blades and every other part that normally come across what you’re grinding.
Step 4: Repeat
Depending on how long you’ve left your meat grinder, you might want to repeat from step 2 down to step 3 until you’re sure that your old meat grinder is completely clean.
Step 5: Rinse And Dry
Once you’re sure that there are no longer grits or stains of any sort, you can now proceed to give them a good rinse then finish it up by wiping the grinder and all it’s parts up with a dry clean towel and allow them to air dry.
Step 6: Store
If you want to use them once they’re dried, you might want to assemble them but if your intention is to use them in a few days time, then you’ll need to store them properly.
One way I’ve found pretty effective when it comes to storing meat grinders part is to place them in a bowl containing uncooked rice. This will help to keep moisture out and prevent them from rusting.
Trending Today
- Are Granite Mortar And Pestle Safe?
- Can A Marble Mortar And Pestle Crack?
- Can You Grind Meat In A Vitamix?
- Can I Use A Meat Grinder To Grind Grains?
- Can You Grind Bones In A Meat Grinder?
- Can You Grind Meat After It’s Cooked?
- How To Clean Capresso Burr Coffee Grinder With Steps
How Do You Get Rust Off A Metal Meat Grinder?
Getting rust off a meat grinder is something I’ve suffered from some time ago when I stopped using the meat grinder my granny left behind before going to meet his creator.
So if you’ve had a rusty grinder, you might relate perfectly to the struggles that accompany getting them cleaned but you know what? I’ve got you. Continue reading to learn how I took those rust off my meat grinder and safe again for grinding.
What You’ll Need
- Vinegar
- Liquid soap (such as Dawn Dish Soap) from Amazon
- Baking soda
- Wire brush (such as this Multi-Purpose Shoe Handle Wire Scratch Brushes) from Amazon
- Mineral oil
- Needle files (such as this MINI Needle File Set) from Amazon
- Gloves
- Towel
- Sponge
Step 1: Disassemble
Start by disassembling your meat grinders, ensure to take out each part and place them carefully in a big bowl
Step 2: Soak
Put all of the dismantled parts in a big bowl then soak in a solution containing White vinegar and warm soapy water for 1 hour.
Step 3: Brush
Once it’s 1 hour already, take each part starting from the blade and gently brush using a wire brush. Remember it’s meat grinders blade you’re dealing with so ensure to put on your rubber gloves. Do this for every other part until they are little to no stains. If they are, then you’ll be needing baking soda.
Step 4: Add Baking Soda
In the case of stubborn rust, you’ll need to add baking soda to the affected part then brush gently using your wire brush. This should completely remove the stains by this time.
Step 5: Cover The Disk With Oil
Once you’ve successfully brushed the disc with baking soda and wire brush, you’ll need to give it a quick rinse then cover the entire dish with mineral oil.
Once the disc is covered with oil, you’ll need to take away those rust hidden inside the holes. One way to do this is by using a Needle file.
You’ll need to use the needle file to take out the rust from both sides of the holes. You might also want to repeat this step the second time to get a good amount of the rusty particles out of the holes.
Step 6: Re-wash
Now that you’ve taken out a good amount of the rust from those individual holes, it’s now time to re-wash each part in soapy water and with a sponge.
Step 7: Rinse, Dry And Assemble
Rinse each part properly with clean flowing water then towel dry and allow it to air dry. Once dried, assemble your grinder then feed damp bread through it (like 2 times) to take away any other particle before using it again to ground meat.
Note: In case you’re finding it hard to get rust completely from your meat grinders plate and knife, the best thing to do is to get a replacement.
Other Ways To Get Rust Off A Metal Meat Grinder Includes;
- Using scouring powder such as “Barkeeper’s Friend“. This powder removes rust from metal surfaces in a breeze and makes them look beautiful again.
- You can also soak the dismantled parts in Coca-Cola overnight then brush gently with a wire brush the next morning. This works like magic as well.
- Another way to get rust from your grinder is to make a baking soda paste then wrap your blades with it. Let it sit on it for a few hours before scrubbing it off with a brush.
- You can also take rust off your grinder by sprinkling salt on the affected parts followed by a drop of lime juice. Let it sit for a few hours before scrubbing it off with brush.
How To Clean An Old Meat Grinder – FAQ
How Do You Restore An Old Meat Grinder?
Well, if this sound like you then follow me as I walk you through the step by step procedures on how you can achieve that. Shall we? Good.
Step 1: Disassemble
The first thing you need do is to dismantle the grinder and set each part apart.
Step 2: Soak Each Part
Once you’ve dismantled the parts, you might want to soak them in a solution of vinegar for a couple of hours before proceeding to the next step
Step 3: Brush Gently
Once each part is fully soaked, you might want to give them a quick brush. This will help take dirt or rust away from the parts and ready for the next step
Step 4: Rinse And Dry
Once you’re sure that the dismantled parts are well cleaned, it’s time to give them a quick rinse then towel dry.
Step 5: Prep Each Part
Now that your meat grinders parts are dried, the next step to take is to prepare them for painting.
Step 6: Priming Metal Surface
Priming is very important at this step as it will help the coating adheres perfectly to the steel surface and provides extra protection to the steel and makes them durable.
Here’s how to properly prime your metal
- Start by scrubbing the metal surface with a wire brush to remove flakes or rust then follow it up with a rust-inhibitive primer (Amazon)
- For areas that are deeply rusted, you can save yourself the stress by using a special primer (such as Rust-Oleum 215215 Stops Rust Rust Reformer) designed to convert rusty surfaces to paint-able one.
- Once this is done, you can now proceed to paint your grinder.
Step 7: Paint
Once you’ve primed your metal, you can then proceed to spray on some few coats of paint until it’s well coated. Don’t forget to cover the inside of your grinder so that paint doesn’t get into the inside.
Step 8: Reassemble
Once dried, you can then reassemble your meat grinder and you’re good to go.
How Do I Clean My Kitchenaid Meat Grinder Attachment?
Kitchenaid grinders are among the good meat grinders we have in the market. However, if this is your first time using it, you might want to know the best way to clean up the attachment that came with it. Continue reading to learn how you can effectively clean your kitchen aid and it’s attachment.
Step 1: Disassemble
To clean your KitchenAid meat grinder, you might want to completely dismantle the unit.
Step 3: Wash
With a bowl of warm soapy water, gently insert the dismantled parts one after the other then use the brush that came along with the grinder to gently brush away meat particles or dirt’s that might have been stocked within the parts. Do this for the blades down to the ground screw.
Step 4: Clean
Once you’ve successfully cleaned them, it’s time to wipe them dry using a towel. Still, confused? The below video might help.
How Do You Clean An Old Coffee Grinder?
No matter how old or rusty your think your antique coffee grinder is, in as much as all the parts are still intact, you can always clean them up and bring them back to life. Here’s a step by step process on how to do that.
Step 1: Disassemble
This is where you’ll need to take away all it’s parts apart to allow for easy access to cleaning.
Step 2: Soak Parts
Soak each dismantled parts (screws, rod, burrs etc) in a solution containing coffee cleaner and hot water for several hours.
Step 3: Clean Coffee Drawer
There’s every possibility that the ground drawer must have been stained with grime and as such need to be cleaned. Ensure to clean them as well and dry them out immediately.
Step 4: Clean The Body
Use a brush or damp cloth to clean the inside of the coffee grinder. Ensure to do this several times until there’s no gunk left in there.
Step 5: Assemble
Once you’re sure all the parts are well cleaned, you can now assemble your coffee grinder back all together and give yourself a treat with that coffee lying on your shelf.
How To Clean An Old Meat Grinder – Conclusion
Cleaning an old meat grinder is the only way to bring them back to life again. No matter how rusty they are, they are still ways you can restore them back and that’s exactly what this post is all about.
So the next time you’re thinking of cleaning or restoring your old meat grinder, don’t forget to refer to this post for steps on how to achieve that.
I hope you’ve leant a thing or two from this article? If so, kindly do me a favour by clicking on the SHARE button located beneath this post. Also, if you have any questions regarding this topic, don’t hesitate to leave a comment below.
